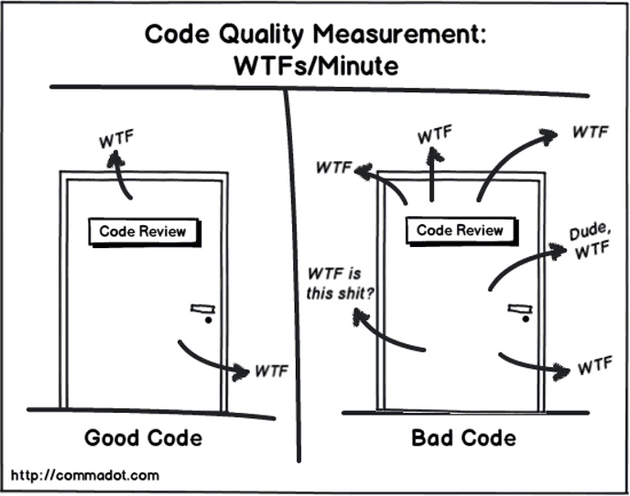
Code is a form of art. Code can be beautiful. Code can read like poetry. Code can also be ugly.
Lately I’ve been working with a lot of PowerShell and my WTFs/m is through the roof. So I started wondering if it’s PowerShell or if it’s me. The truth is probably somewhere in the middle but in this post I want to share with you what I learned while doing some serious research on PowerShell maintainability and scalability.
TL;DR This repo on GitHub contains all the concepts I discuss below: https://github.com/WouterDeKort/MaintainablePowerShellDemo
What’s the my problem with PowerShell?
I’m working with a large enterprise that’s embarking on their Azure cloud journey. They use Azure DevOps for planning, building, testing and releasing everything. We have ARM templates for Azure resources. We also have a lot of PowerShell and PowerShell DSC scripts for running automation and configuring Azure IaaS VMs. We’ve also invested in custom build and release tasks for Azure DevOps to help the teams reuse tasks and standardize compliancy and security checks.
Unfortunately I’ve seen scripts explode to thousands of lines with hundreds of if statements, hard coded values, variable names like url, url1 and url2 all over the place. They’re a mingle of sequential code and some functions. Overall, I find those scripts extremely hard to understand, maintain and work with.
This isn’t PowerShells fault. As a developer we create those enormous scripts, choose variable names, nest if statements and overall make something that is hard to maintain. I do think that PowerShell doesn’t help you move in the right direction. People can write terrible code in a language like C# but overall C# points you in the right direction. It’s easy to create classes, functions, properties etc. I’ve seen people write enormous C# files and methods but I’ve also seen some beautiful code in C#.
Step 1: Configure your IDE
Call me a bit strange but if code looks like this I get distracted:
if(!(Test-Path   $PropFile -PathType Leaf)){
 throw "File sonar.properties cannot be found."}
Misaligned braces, too much or too little white space. All those little things just kill code quality. Let your IDE help you with these things.
Writing good code starts with selecting a good IDE and configuring it correctly. I love VS Code and VS Code is very well equipped for writing PowerShell code. To get started just install the PowerShell extension (see PowerShell in Visual Studio Code for more details). You will immediately see that this gives you syntax highlighting but there is more.
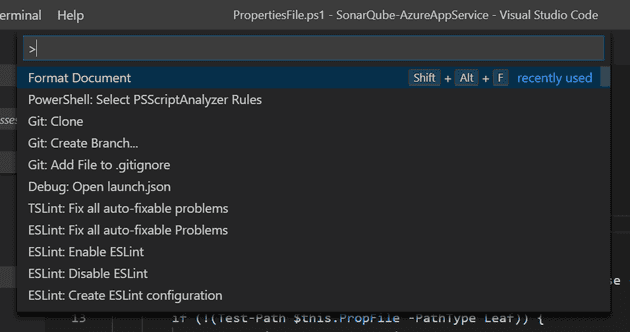
One thing that really helps is Format Document. Run that command on your PowerShell script and it will nicely format your code in a consistent manner for all people on your team.
Another thing that’s very important for every programming language is linting. A linter, is a tool that analyzes source code to flag problems. These can be actual bugs but also syntax and style problems.
The PowerShell extension for VS Code installs PSScriptAnalyzer. This tool helps you in scanning your code based on a set of rules that flag all kinds of problems. On the GitHub page of PSScriptAnalyzer you can find all the details but it comes down to this:
Install-Module -Name PSScriptAnalyzerInvoke-ScriptAnalyzer .\DownloadAndExtractLatestSonarQube.ps1

RuleName                            Severity     ScriptName Line  Message
PSAvoidTrailingWhitespace           Information  File.ps1   16    Line has trailing whitespace
Since this is integrated into VS Code you get the same issues shown as Problems:
The analyzer doesn’t catch all the issues I would like but it’s a start to get some consistency and help when writing PowerShell scripts.
Step 2: Functions
Large sequential scripts are hard to maintain. Research has shown that on average we can keep 7 things in our working memory. This means that a large script with many elements doesn’t fit in your working memory. Splitting a script into smaller parts lets you forget about the internals of the function. That means that a paragraph of code that does many things and doesn’t fit in your working memory can be collapsed into one function with a good descriptive name.
Let’s take an example. What does the following code do?
Get-ChildItem $HOME | Where-Object { $_.Length -lt $Size -and !$_.PSIsContainer }
It will probably take you some time to figure out it gives you all files that are less than the specified size and are not a directory.
Now look at the following:
Get-SmallFiles -Size 50
This is a descriptive name and a parameter that helps you understand what the functions does. You don’t care about how it does that. That’s what functions do for you.
Step 3: Classes
Splitting code into methods helps with your working memory. Object oriented design is the next step. You group methods and data belonging together in a class. That class then hides all the complexity into a black box that you don’t have to worry about anymore.
PowerShell 5 added classes. The following shows a class I created for modifying a SonarQube config file. The class searches for the config file and then lets you update the username, password and connection string:
class PropertiesFile {

    [string]$Content
    [string]$PropFile

    PropertiesFile([string]$pathToSonarQube) {
        $this.LoadContent($pathToSonarQube)
    }

    hidden [void]LoadContent([string]$pathToSonarQube) {
        $this.PropFile = (Get-ChildItem 'sonar.properties' -Recurse -Path $pathToSonarQube).FullName

        if (!(Test-Path $this.PropFile -PathType Leaf)) {
            throw "File sonar.properties cannot be found."
        }

        $this.Content = Get-Content -Path $this.PropFile -Raw
    }

    [void] UpdateUserName([string] $SqlLogin) {
        $this.Content = $this.Content -ireplace '#sonar.jdbc.username=', "sonar.jdbc.username=$SqlLogin"
    }

    [string] UpdatePassword([SecureString] $SqlPassword) {
        $BSTR = [System.Runtime.InteropServices.Marshal]::SecureStringToBSTR($SqlPassword)
        $UnsecurePassword = [System.Runtime.InteropServices.Marshal]::PtrToStringAuto($BSTR)

        $this.Content = $this.Content -ireplace '#sonar.jdbc.password=', "sonar.jdbc.password=$UnsecurePassword"

        return $UnsecurePassword
    }

    [void] UpdateConnectionString([string] $sqlServerUrl, [string]$database) {
        $ConnectionString = "jdbc:sqlserver:$sqlServerUrl" + ":1433;database=$database;encrypt=true;trustServerCertificate=false;hostNameInCertificate=*.database.windows.net;loginTimeout=30"

        $this.Content = $this.Content -ireplace '#sonar.jdbc.url=jdbc:sqlserver:localhost;databaseName=sonar;integratedSecurity=true', "#xxx"
        $this.Content = $this.Content -ireplace '#sonar.jdbc.url=jdbc:sqlserver:localhost;databaseName=sonar', "sonar.jdbc.url=$ConnectionString"
    }

    [void] WriteFile() {
        Set-Content -Path $this.PropFile -Value $this.Content
    }
}
A class can have a constructor and you can help IntelliSense by adding [hidden] attributes. This is all cosmetics because it doesn’t prevent you from calling the method.
After playing with classes for a while I have to say the PowerShell implementation is far from perfect. Especially when splitting your PowerShell code over multiple files things start to break down. PowerShell lets you export a function from a file so others can use it. I haven’t found how do this for classes. Instead, I see people doing a compile step where you collect all your code and merge it into one single file in a predefined order.
This is where a task runner like psake comes in.
Step 4: Task Runner
psake is a build automation tool written in PowerShell. It’s usage is simple:
.\build.ps1 -Task Build
Executing Init

STATUS: Testing with PowerShell 5
Build System Details:

Name                           Value
---- -----
BHProjectName                  SonarQubeDeploy
BHModulePath                   C:\Source\SonarQube-AzureAppService\SonarQubeDeploy
BHPSModulePath                 C:\Source\SonarQube-AzureAppService\SonarQubeDeploy
BHBuildOutput                  C:\Source\SonarQube-AzureAppService\BuildOutput
BHCommitMessage                Added bin folder for sonarqube
BHPSModuleManifest             C:\Source\SonarQube-AzureAppService\SonarQubeDeploy\SonarQubeDeploy.psd1
BHBuildSystem                  Unknown
BHBranchName                   master
BHBuildNumber                  0
BHProjectPath                  C:\Source\SonarQube-AzureAppService


Executing Clean
    Cleaned previous output directory [C:\Source\SonarQube-AzureAppService\out]
Executing Compile
    Created compiled module at [C:\Source\SonarQube-AzureAppService\out\SonarQubeDeploy]
Executing Build

psake succeeded executing .psake.ps1

----------------------------------------------------------------------
Build Time Report
----------------------------------------------------------------------
Name    Duration
---- --------
Init    00:00:00.020
Clean   00:00:00.014
Compile 00:00:00.028
Build   00:00:00.000
Total:  00:00:00.186
psake lets you define task and dependencies between those tasks. It creates a report for you showing input variables, logs for the various task that run and their duration. Combined with PSDepend the build script can install any requirements for your build process.
A typical psake task looks like this:
task Init {
"`nSTATUS: Testing with PowerShell $psVersion"
"Build System Details:"
Get-Item ENV:BH*
"`n"
} -description 'Initialize build environment'
You can also define tasks that just group other tasks like this:
task Test -Depends Init, Analyze, Build, Pester -description 'Run test suite'
An important task is Compile since that one is used to group all your classes and other code in one file to make sure it works at runtime:
task Compile -depends Clean {
    # Create module output directory
    $modDir = New-Item -Path $outputModDir -ItemType Directory
    New-Item -Path $outputModVerDir -ItemType Directory > $null

    # Append items to psm1
    Write-Verbose -Message 'Creating psm1...'
    $psm1 = Copy-Item -Path (Join-Path -Path $sut -ChildPath 'SonarQubeDeploy.psm1') -Destination (Join-Path -Path $outputModVerDir -ChildPath "$($ENV:BHProjectName).psm1") -PassThru

    # This is dumb but oh well :)
    # We need to write out the classes in a particular order
    $classDir = (Join-Path -Path $sut -ChildPath 'Classes')
    @(
        'PropertiesFile'
    ) | ForEach-Object {
        Get-Content -Path (Join-Path -Path $classDir -ChildPath "$($_).ps1") | Add-Content -Path $psm1 -Encoding UTF8
    }
    Get-ChildItem -Path (Join-Path -Path $sut -ChildPath 'Private') -Recurse |
        Get-Content -Raw | Add-Content -Path $psm1 -Encoding UTF8
    Get-ChildItem -Path (Join-Path -Path $sut -ChildPath 'Public') -Recurse |
        Get-Content -Raw | Add-Content -Path $psm1 -Encoding UTF8

    Copy-Item -Path $env:BHPSModuleManifest -Destination $outputModVerDir

    # Fix case of PSM1 and PSD1
    Rename-Item -Path $outputModVerDirsonarqubedeploy.psd1 -NewName SonarQubeDeploy.psd1 -ErrorAction Ignore
    Rename-Item -Path $outputModVerDirsonarqubedeploy.psm1 -NewName SonarQubeDeploy.psm1 -ErrorAction Ignore

    "    Created compiled module at [$modDir]"
} -description 'Compiles module from source'
The big problem with this compile step is that PowerShell can’t parse your code successfully at design time. VS Code shows all kinds of red squiggles and you lose IntelliSense. This makes it hard navigate around your code while writing it.
Step 5: Unit Testing
Another very important step in writing maintainable code is test automation. Having a good set of unit tests that cover your code helps you maintain it in the future.
PowerShell has a popular test framework named Pester that helps you with grouping your unit tests and running assertions on them. For testing the PropertiesFileclass I start with a mock where I overwrite the part that loads the sonar.config file and instead hardcode some test data. I then define the unit tests one by one and Pester takes care of the rest.
using module SonarQubeDeploy

class MockPropertiesFile : PropertiesFile {

    $fakeContent = @"
#sonar.jdbc.username=
#sonar.jdbc.password=
#sonar.jdbc.url=jdbc:sqlserver:localhost;databaseName=sonar;integratedSecurity=true
#sonar.jdbc.url=jdbc:sqlserver:localhost;databaseName=sonar
"@

    MockPropertiesFile([string]$fakepath ) : base($fakepath) {
    }

    [void]LoadContent([string]$pathToSonarQube){
        $this.Content = $this.fakeContent
    }
}

InModuleScope SonarQubeDeploy {
    Describe 'PropertiesFile' {
        Context "When processing the sonar.properties file" {
            it 'Loads the hard coded content' {

                $propertiesFile = [MockPropertiesFile]::new("fakepath")
                $propertiesFile.Content | should be $propertiesFile.fakeContent
            }

            it 'Replaces the Username correctly' {
                $userName = 'MySecureUser'

                $propertiesFile = [MockPropertiesFile]::new("fakepath")
                $propertiesFile.UpdateUserName($userName)

                $propertiesFile.Content | Should -Match $userName
            }

            it 'Replaces the SQL Password correctly' {
                $propertiesFile = [MockPropertiesFile]::new("fakepath")
                $plainText = "Plain text"
                $encryptedPassword = $plainText | ConvertTo-SecureString  -AsPlainText -Force

                $propertiesFile.UpdatePassword($encryptedPassword)

                $propertiesFile.Content | Should -Match $plainText
            }

            it 'Replaces the Connection string correctly' {
                $propertiesFile = [MockPropertiesFile]::new("fakepath")
                $propertiesFile.UpdateConnectionString("sqlServer.azure", "SonarQubeDb")

                $propertiesFile.Content | Should -Match "SonarQubeDb"
                $propertiesFile.Content | Should -Match "sqlServer.azure"
            }
        }
    }
}
A simple Azure DevOps pipeline
I’ve created a sample yaml file that compiles the PowerShell module and runs the tests.
jobs:
  - job: Build_PS_Win2016
    pool:
      vmImage: vs2017-win2016
    steps:
    - powershell: |
        .build.ps1 -Task Test -Bootstrap -Verbose
      displayName: 'Build and Test'
    - task: PublishTestResults@2
      inputs:
        testRunner: 'NUnit'
        testResultsFiles: '**outtestResults.xml'
        testRunTitle: 'PS_Win2016'
      displayName: 'Publish Test Results'
Am I happy?
I now have a working solution where I can use classes, run linting, run unit tests and publish a module as the result of it all. I think that at least offers the possibility of writing more maintainable code. However, the overall experience is terrible. There is a lot of magic involved and the loss of design time support makes it only harder. I think this is the best PowerShell can do at the moment when it comes to object oriented code.
A totally different approach is writing the PowerShell module not in PowerShell but in C# and .NET Core. For end users, nothing changes. The resulting module can still be used nicely from PowerShell. As a developer, you use C# with all the design time features that Visual Studio and VS Code offer. I think that’s the direction I want to go but it will mean that IT Pros with a PowerShell background suddenly need to learn C# which is a big step.
Comments? Feedback? Please let me know!


